Mains

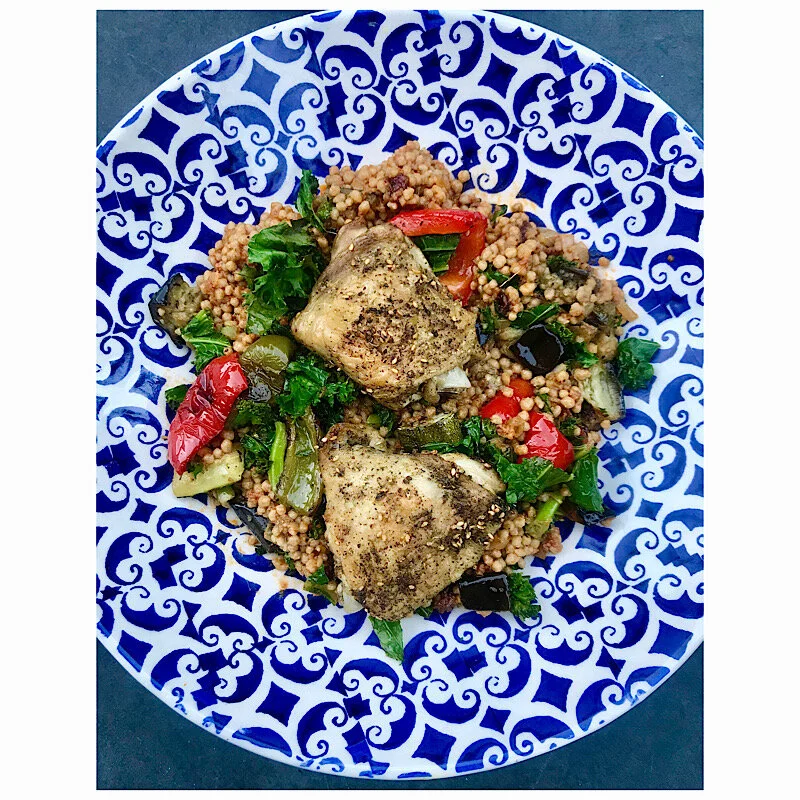
Maftoul with roast vegetables, dates and za'atar chicken

IMG_6661.JPG

Maftoul, oversized Palestinian couscous, is absolutely wonderful.  Made from bulgur and whole wheat, and traditionally hand rolled by women, it’s simple to cook and much more interesting to eat than standard couscous. (My son refers to couscous, disparagingly, as fluff.  He’s kind of right.) 

The maftoul, dates and za’atar (an aromatic spice mix) were sent to me by Zaytoun, a social enterprise I’ve reported on before. It was founded 16 years ago to forge a UK market for artisanal Palestinian produce. Farmers in Palestine’s territories, the West Bank and Gaza, have long faced huge obstacles earning a decent living, partly because it’s so difficult for them to reach crucial export markets under Israeli occupation.  Restrictions on movement make travel enormously difficult and land has been seized and encroached on by settlements. Now, Covid has made things so much worse, especially for small farmers.  A second wave of the virus has hit the West Bank, more terrible than the first. And global shortages of medical supplies are exacerbated by the ongoing political turmoil.  

One way to support the farmers is to buy their delicious products - all the ingredients for this dish are available on the Zaytoun website. (Disclaimer: the maftoul, dates and za’atar were gifted to me but this post is not a paid-for advertisement. I believe in Zaytoun’s mission and their products are spectacular).

Serves 2 - 4 (depending on your appetite and what else you serve)

olive oil

2 tablespoons za’atar

4 skin-on, bone-in chicken thighs

Enough chopped veg to fill a roasting tray: peppers, courgettes, aubergines, carrots, red onion

1 onion, chopped

1 garlic clove, chopped

200g maftoul, rinsed

2 tablespoons harissa paste (or tomato paste will do)

350ml chicken or vegetable stock

4 or 5 medjool dates

1 heaped tablespoon chopped preserved lemon

Fresh chopped herbs like parsley or coriander

  1. Preheat the oven to 180C. Place the chicken thighs in a roasting tray, drizzle with oil and sprinkle over the za’atar and some salt. Rub into the chicken all over and roast for 30 minutes or so, skin-side up on the top oven shelf, until completely cooked through.

  2. Meanwhile, roast the vegetables. Place any root vegetables like carrots in a second roasting tray, drizzle with oil and sprinkle with salt. Roast for 10 minutes on the lower shelf before adding the remaining vegetables (adding more oil and salt as necessary). Roast until all the vegetables are tender. If the chicken is cooked first, just set it aside to rest covered loosely in foil.

  3. While the oven is doing its thing, prepare the maftoul. In a medium pan, add a good glug of oil followed by the onion and a pinch of salt. Cook gently until the onion is completely soft. Add the garlic and harissa paste, stir into the onion and cook for a few minutes more until lovely and fragrant.

  4. Add the maftoul and stir to coat, then pour in the stock. Bring to the boil, then reduce the heat to low and cover. Simmer for ten minutes, then remove from the heat and leave to steam for a further 10 minutes, covered.

  5. Tip the maftoul into a large serving bowl or platter and fold in the dates and preserved lemon, and then most of the vegetables. Top with the remaining vegetables, the chicken thighs and herbs, proudly bear to the table to serve.

 

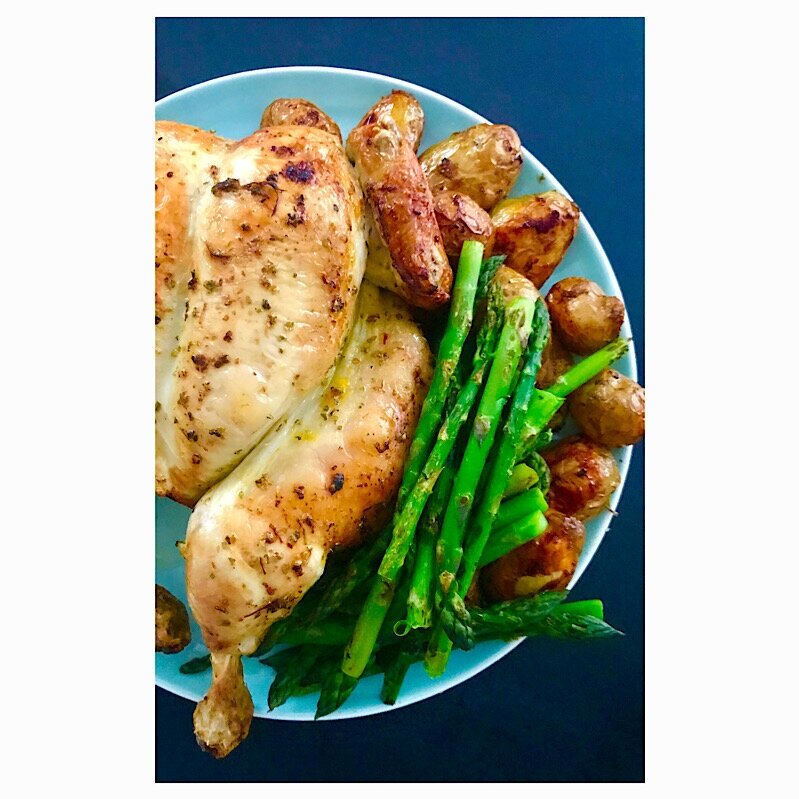
Roast spatchcocked chicken with saffron, herbs and chicken-juice potatoes

Spatchcocked+chicken.jpg

 Serves 4

For the marinade

5 garlic cloves, crushed

1 teaspoon sea salt flakes

1 ½  tablespoon dried oregano

1 tablespoon fresh thyme leaves, plus a few extra sprigs

120ml extra-virgin olive oil

a generous pinch of saffron, chopped, or chilli flakes

finely grated zest and juice of  1 lemon

freshly ground black pepper

For the chicken and potatoes

1 free-range chicken

700g new potatoes

 1. Place all the marinade ingredients plus 2 tablespoons of warm water in a small bowl and stir to combine. Set aside.

2. Now, spatchcock the chicken. Place the bird breast-side down on a chopping board with the legs towards you. Using sharp kitchen scissors, cut along each sides of the parson’s nose, through the ribcage and to the other end of the bird. Remove the backbone and reserve for stock or freeze until you’re ready to use it. Turn the chicken over and press down with the heel of your hand to flatten.

3. Place the chicken in a non-metallic shallow bowl large enough for it to lay flat, pour over three-quarters of the marinade and massage in well all over.  With the bird skin-side down, cover and place in the fridge for at least an hour, ideally overnight.

4. Heat the oven to 200°C. If you want to roast the chicken over the potatoes (the spuds stay slightly crisper this way) have 2 oven racks ready: one for the tray of potatoes and another for the chicken.

5. Place the potatoes in a roasting tray large enough for them to sit in a single layer. Toss with the remaining marinade. Now, either place the chicken directly on top of the potatoes, skin-side up OR sit the chicken on the top rack skin-side up and the tray of potatoes on the rack underneath (be sure to place it directly under so as to catch all the juices).

6. Roast for 45 minutes - 1 hour or until the chicken juices run clear when you pierce the flesh between the thigh and the breast with a knife. Serve with the lemony pan juice spooned over and some garlicky mayo/aioli on the side, and some greens.

Roast turbot with bay and blood orange hollandaise

Once upon a time, even the thought of making hollandaise made me a bit afraid. This classic, sublimely buttery sauce – soul mate of asparagus, eggs, new potatoes, green vegetables, fish … actually, anything you can reasonably pour thick silken ribbons of the stuff onto … is notoriously easy to botch. Too much heat and the emulsion of egg yolks and butter will separate, leaving you with a heartbreaking curdled mess rather than creamy, glossy deliciousness.

Hollandaise takes some skill and practice, for sure; god knows I only got the knack after countless failed attempts. But what I’ve come to learn is that, like so many dishes, hollandaise can detect the faintest whiff of fear, filthy bad mood or stress. Attempt to make it with one of these humours lurking in the kitchen,  and chances are that some of your anxiety or waspishness will spill over into the mix and ruin it.

Nigerian food writer Yemisi Aribisala puts her finger on it in her wonderful book, Longthroat Memoirs: Soups, Sex and Nigerian Taste Buds. “That which you cook is informed by everything about you: your mood, spirit, environment, temperament,” she says. She’s so right.  Further,  I've found that some dishes are more willing than others to turn a blind eye to your panic or bad mood. Stew, for example, doesn’t seem to mind a bit whether you hum cheerfully as you chop or peevishly throw everything into the pot. But in my kitchen at least, sauces, bread, pastry and fish are more sensitive culinary creatures, more likely to behave well if I approach them with my chest puffed out with confidence and a spring in my step.

I recently made this dish after a long day walking and exploring the coastal paths near Lulworth Cove, a glorious horse shoe bay a little way east along the Dorset coast from my home. It was bitingly cold but the sun was shining on a glorious landscape, I didn’t fight with the children for the whole entire day and the dog did not raid anybody’s picnic and steal their sandwiches. I bought the turbot from the lovely lady at Cove Fish, whose son and husband (eleventh and twelfth generation fishermen, no word of a lie) caught the little beauty in the bay the day before. In summary: there was no chance my hollandaise was going to go wrong.

If you too are little bit afraid of making hollandaise, turn on the radio,  pour yourself a glass of wine and politely wave the children off to play on their screens. Whatever you do, do not multitask, rather immerse yourself in the process, stirring constantly and cooking it slowly. If it all goes wrong (which it probably will if you’ve never made it before) just cheerfully start again. 

Roast turbot with bay + blood orange hollandaise

Turbot is rightly known as The King of Fish – it’s absolutely delicious but can be royally expensive. Choose another whole fish if you like, but the cooking time will probably vary from this.  To check your fish for doneness, push a knife into the thickest part of the fish near the backbone; gently prise it up so you can check the flesh – if it’s opaque it’s done, if it’s still translucent, it needs a little more time. The hollandaise here is flavoured with orange unlike the standard version season with lemon juice.

Serves 4

  • A little olive oil for oiling
  • 1 turbot, about 1.5kg, gutted
  • A handful of fresh bay leaves or a small handful of dried ones
  • A good few tablespoons of unsalted butter
  • Sea salt 
  • Freshly ground black pepper

For the hollandaise (based on a recipe from Leith’s Cookery Bible)

  • 3 egg yolks
  • A pinch of sea salt
  • 100ml white wine vinegar
  • 10 black peppercorns
  • 2 bay leaves
  • 170g butter, cut into small cubes
  • Finely grated zest ¼ blood orange (any other sweet orange is fine)
  • 1 tablespoon blood orange juice (any other sweet orange is fine)
  • Lemon juice, to taste (optional)
  1. Preheat the oven to 220°C and lightly oil a roasting tray large enough to hold the turbot.  
  2. Season the cavity with salt and pepper and stuff with the bay leaves. Season well and place in the roasting tray dark-side up.  Generously smear  with butter and roast for 20 minutes, basting halfway through. Check to see if it’s done – if not return to the oven a little longer.
  3. Meanwhile, make the hollandaise. Put the vinegar, peppercorns and bay leaves in a small pan and simmer very gently until reduced to about one generous tablespoonful. Set aside to cool.
  4. Find a medium pan for which you have a heatproof bowl that sits nicely on top without touching the bottom. Fill the pan with a few centimetres of water and bring to a gentle simmer. 
  5. While this is happening, place the egg yolks in the heatproof bowl and whisk with a pinch of salt until creamy. Strains the cooled reduced vinegar into the eggs, and discard the peppercorns and bay leaves. Stir in the orange juice and zest.
  6. Set the bowl with the eggs over the simmering water and whisk in the butter cube by cube, making sure each one has melted and amalgamated into the sauce before adding the next. After you have added about half the butter, you can start to add it in larger quantities.
  7. When the butter is all used up, whisk continuously until the sauce is thick and falls off the the thick in ribbons that leave a trail. Pull the pan off the heat at once if you see steam coming from the pan. Taste for seasoning and add salt and lemon juice if you like. 
  8. Set aside in a warm place until you area ready to serve the fish – hollandaise doesn’t cope with reheating.  This dish is fantastic served with buttery kale and crushed new potatoes.


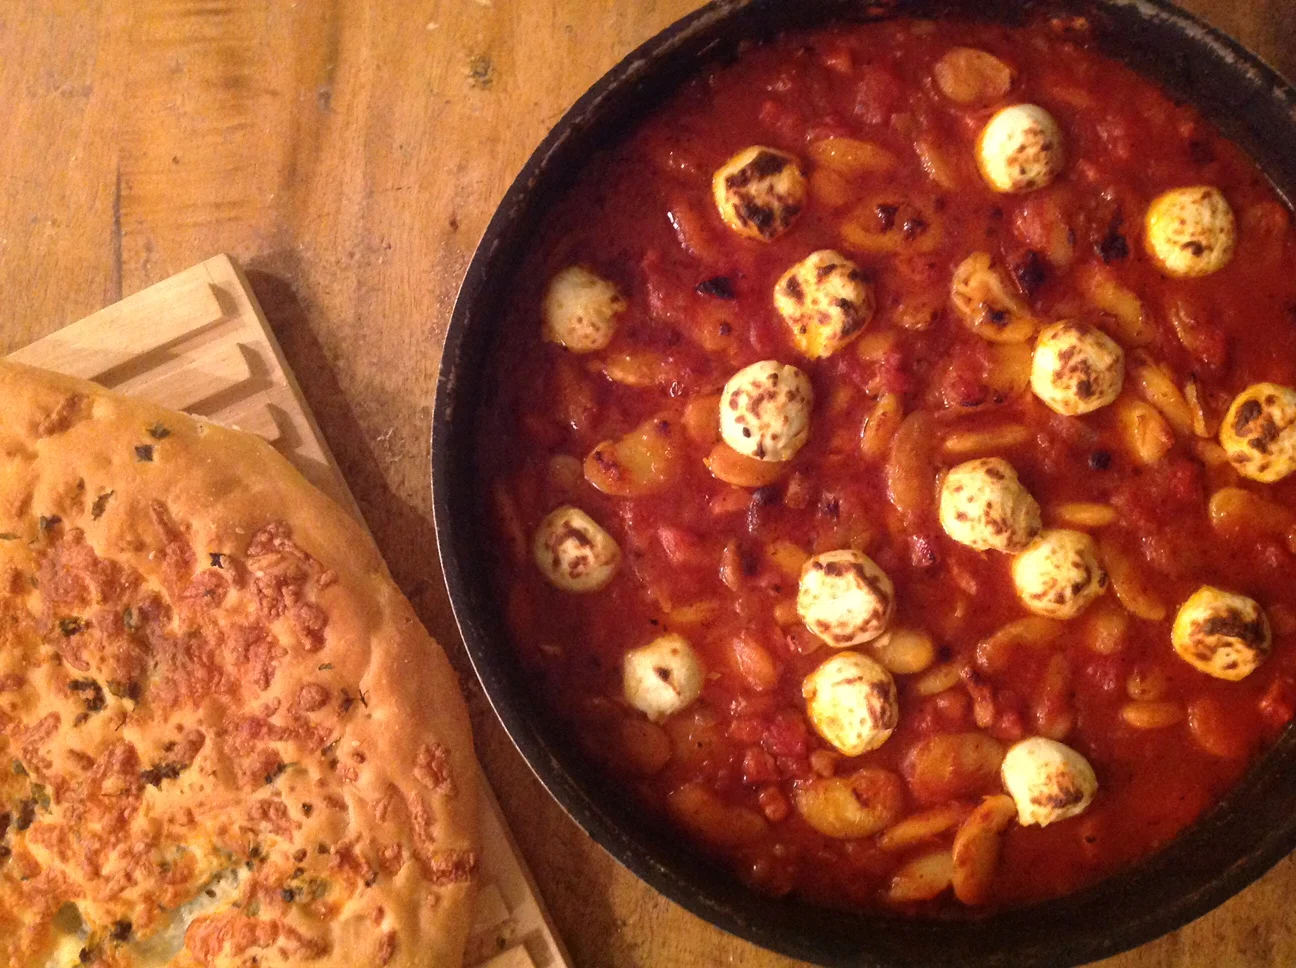
Spicy bean stew with mozzarella puddles

beans and mozzarella

Do you soak dried beans for 12 hours before you cook them? Or do you reach for the canned stuff because a) you cant be bothered  b) you don’t plan your meals that far ahead? c) you meant to but forgot?

Take heart. A slew of recent cookery articles has confirmed what some people have believed for years – beans don’t really need to be soaked before cooking.  Melissa Clark in the New York Times is one such Non Soaker. In a recent article she exhorted readers to ditch canned beans for dried because dried are so easy to cook from scratch: just simmer in salted water until tender without soaking first, she suggests. The keen beans at Epicurious quickly jumped on the no-soak bandwagon too.

As a Soaker I was intrigued – the conventional wisdom, echoed by many fine food writers, is that soaking beans slashes the cooking time and softens the skins. But after a little experimentation myself, involving several pans of butter beans and different cooking methods, I’m pretty much converted. By all means, soak beans if you have the time or inclination, or cheat-soak by bringing your beans to the boil, turning off the heat and leaving them to sit in their water for an hour. But really, soaking them first will save you barely any cooking time at all.

Another thing my experiment confirmed is that salting the water in which you cook the beans does not make them tough, just tastier; tossing in an onion and some bay leaves makes them even more flavourful. And this is where beans cooked from scratch have the edge over canned. Melissa Clarke describes canned beans are “a wan simulacrum, fine in a pinch but never transcendent.” While I love her description, I don’t agree – good quality tinned or canned beans can be perfectly lovely. But there is something wonderfully calming about cooking a pan of dried  beans; the starchy broth it produces is delicious added to soups and bean dishes (as Rachel Roddy explains so well in her wonderful cookbook Five Quarters). Plus, the beans you cook yourself are definitely creamier than canned.

I generally cook whole packets of beans at a time these days, rather than leave oddments in the larder, and either keep the cooking pan (with the beans and liquid) in the fridge for cooking meals throughout the week (as per Roddy’s suggestion). Or else I freeze what I’m not using immediately, for reheating in fresh water later. This is handy because if you have beans to hand you have a meal.

Beans slurp up flavours, so I cook them all sorts of ways. I often blitz them into a creamy puree in the blender, adding some of the bean cooking water to loosen, then maybe some herbs and spices, yoghurt or olive oil, a garlic clove or maybe even a little saffron crushed in hot water. To make soup, stir in lots of hot stock, or leave it thick and creamy to serve in lieu of mashed potatoes with meat (lamb chops!) or for dunking vegetables.

Beans are also fantastic in the soup pot – with or without a bacon bone – and lots of lovely vegetables, or used to bulk out stews if you’re trying to cut down on meat. I’m rather fond of the recipe below – it’s a bean stew in its own right, although the addition of bacon and/or chorizo really elevates it into something wonderful. 

Spicy bean stew with mozzarella puddles

You can easily make this a vegetarian version just by leaving out the pancetta or chorizo

  • Olive oil
  • 200g pancetta or cooking chorizo
  • 1 onion, finely chopped
  • 2 garlic cloves, finely chopped
  • 2 tins tomatoes, chopped
  • 1 red pepper, chopped
  • 1 tablespoon chipotle paste
  • ¾ tbsp dried oregano
  • 600g cooked white beans + 1 cup of cooking liquid
  • 120g mozzarella or labneh balls (or 2cm cubes)
  • salt and pepper

Warm a good splash of olive oil in an ovenproof frying pan and add the pancetta or chorizo. Cook, stirring often, until the pancetta is crispy at the edges and starting to turn golden. Remove from the pan with a slotted spoon and put to one side. Add the onion and a pinch of salt to the pan and cook very gently for 10 minutes, until very soft and golden. Add the red pepper and garlic and cook for a couple of minutes more. Stir in the pancetta and chipotle paste so it’s combined with all the ingredients and lovely and aromatic. Add the tomatoes and oregano, squash any big bits with a wooden spoon, and season well with salt and pepper. Add 250ml of the bean cooking liquid (or water if you don’t have any) and simmer for 10 minutes or until thickened slightly. While this is happening, preheat the grill to high. Add the beans to the tomato mixture and simmer for 5 minutes more, until warmed through. Dot the top of the mixture with mozzarella or labneh all and set under the grill for 5 minutes, or until melted into creamy puddles.

Spaghetti with red chicory, bacon and garlic crumbs

Salty, crunchy, bitter and savoury: a glorious combination in a quick and easy pasta dish.

Serves 4

  • 400 g (14 oz) spaghetti

  • 1 tablespoon olive oil, plus extra for cooking

  • 2 thick rashers smoked bacon, cut into matchsticks

  • 250 g (9 oz) red chicory (endive or witlof), thinly sliced with a few of the end parts of the red leaves torn

  • 2 tablespoons dry white wine

  • finely grated zest of 1 lemon

  • 1 small handful flat-leaf parsley leaves

For the garlic crumbs

  • 1 tablespoon olive oil

  • 30 g (1 oz) good-quality fresh breadcrumbs, ideally made from sourdough or Olive oil bread

  • pinch of sea salt flakes

  • 2 garlic cloves, crushed

  • finely grated zest of 1 lemon

  1. Get the water for your pasta on the go – don’t add too much salt as salty bacon is in play here.

  2. While it’s coming to the boil, make the garlic crumbs. Heat the olive oil in a large frying pan, add the breadcrumbs and a pinch of sea salt, and stir-fry over high heat until the breadcrumbs just start to smell toasty, about 3 minutes.

  3. Add the garlic and cook, stirring to stop it burning, for a couple of minutes more.

  4. Pull the frying pan off the heat and stir in the grated lemon zest, then spread the breadcrumbs out on a plate so they stay crisp.

  5. Wipe out the pan.

  6. Add the pasta to the boiling water, then heat the olive oil in the frying pan. Add the bacon and fry over medium heat until starting to turn golden.

  7. Add the sliced witlof and fry for a few minutes more, stirring often, until it is just softened.

  8. Pour in the wine.

  9. While it’s bubbling up, scrape the bottom of the pan with a wooden spoon to loosen any delicious caramelised bits.

  10. Pull the pan off the heat.

  11. When the pasta is cooked, drain it, keeping a little of the cooking liquid.

  12. Tip the pasta into the frying pan, return to low heat and add a splash of the olive oil and a splash of the cooking liquid.

  13. Gently toss to combine and warm the pasta through, adding more oil or liquid if the pasta is dry.

  14. Add the lemon zest, parsley, torn witlof and half the garlic crumbs to the frying pan, then gently toss.

  15. Serve immediately, with the remaining garlic crumbs sprinkled over the top.

Warm salad of farro, roasted vegetables and chestnuts

Farro is such a beautiful wheat grain, bursting with fibre, protein and other good things, as well as being chewy and delicious. If you can’t find it, substitute it with spelt, although it’s much softer. This is a glorious autumnal or winter dish, and one that I often adapt according to what I have by way of vegetables.

Keep the beetroot in, as its colour is lovely against the grains and adds earthy sweetness. I haven’t included them in the recipe below, but the Confit shallots with herbs and garlic (page 153) are absolutely wonderful tossed into the mix as well.

Serves 4–6 as a side.

  • 150 g (5½ oz) celeriac
  • 150 g (5½ oz) carrots
  • 200 g (7 oz) raw beetroot
  • 3 tablespoons olive oil
  • 2 tablespoons honey
  • 1 teaspoon sumac
  • leaves from 1 lemon thyme or thyme sprig
  • ½ teaspoon sea salt flakes, plus extra for seasoning
  • freshly ground black pepper
  • 50 g (1¾ oz) vacuum-packed chestnuts
  • 140 g (5 oz) pearled farro
  • 2 tablespoons mixed seeds, such as pepitas (pumpkin seeds) and sunflower seeds
  • 1 handful flat-leaf parsley leaves, roughly chopped
  • extra virgin olive oil, for drizzling

For the dressing

  • 2 tablespoons white balsamic vinegar
  • 2 tablespoons extra virgin olive oil
  • 2 tablespoons walnut oil
  • 1 tablespoon honey
  1. First, get your vegetables on the go. Preheat the oven to 200°C (400°F). Peel the celeriac, carrots and beetroot, and cut them into 3 cm (1¼ inch) chunks. Pop the vegetables into a large roasting tin in a single layer.
  2. Whisk together 2 tablespoons of the olive oil, the honey, sumac and thyme, season with sea salt and black pepper, and pour over the vegetables. Toss to coat.
  3. Roast for 30 minutes, then add the chestnuts, shaking to coat them in the oil. Roast for 15 minutes more or until everything is softened and golden.
  4. While the vegetables are roasting, put the farro, the ½ teaspoon sea salt and the remaining 1 tablespoon oil in a saucepan.
  5. Pour in 700 ml (24 fl oz) water and simmer for 20–25 minutes or until the grains are tender – bear in mind that farro retains some bite and chewiness when cooked. If the water is absorbed before the grains are done, add a little boiling water; if there is excess liquid when cooked, drain this off.
  6. While the grains are cooking, make the dressing – just put all the ingredients in a screw-top jar and shake well.
  7. As soon as the farro is ready, add half the dressing and toss – do this while the grains are still hot so they absorb the flavours. Set aside to keep warm.
  8. Transfer the cooked vegetables to a serving platter or bowl. Add the farro, seeds and most of the parsley. Gently toss with enough of the remaining dressing to generously coat. Taste for seasoning and add more salt and pepper if necessary – the farro might need quite a bit of salt.
  9. Serve warm or at room temperature, scattered with the remaining parsley and drizzled with extra virgin olive oil.

Baked eggs with greens, avocado and yoghurt

Serves 2–4

  • 2 tablespoons olive oil
  • 250 g (9 oz) mixed greens such as kale, spring greens, wild garlic, savoy cabbage, beetroot greens, turnip tops and parsley, thinly sliced
  • sea salt flakes
  • freshly ground black pepper
  • 2 garlic cloves, finely chopped
  • 60–125 ml (2–4 fl oz/¼–½ cup) chicken or vegetable stock
  • a pinch of Aleppo pepper or
  • chilli flakes
  • 4 eggs
  • 1 avocado, sliced
  • 3 tablespoons Greek-style yoghurt
  • smoked paprika, for sprinkling
  1. Preheat the oven to 180°C (350°F).
  2. Warm the olive oil in an ovenproof frying pan over medium–high heat and add the mixed greens, handful by handful, stirring and allowing them to wilt as you go. It might seem like you have too many greens but don’t worry, they will cook down.
  3. Season with sea salt and black pepper, then stir-fry for a couple of minutes until all the greens have softened slightly.
  4. Add the garlic and a splash of the stock, then continue to stir-fry for a couple more minutes until the leaves are tender.
  5. Add as much stock as you need to prevent the greens drying out and sticking to the pan, but you don’t want any liquid left when the greens are cooked.
  6. Remove the pan from the heat and stir in the Aleppo pepper or chilli flakes.
  7. Make four indentations in the greens and crack an egg into each one, then arrange the avocado slices around the eggs.
  8. Stir the yoghurt well to loosen it, then spoon it in blobs over the greens and sprinkle with paprika.
  9. Bake for about 10 minutes or until the egg whites are just set and the yolks are still runny. Serve immediately, accompanied by some good bread, if you like.